Sunday, September 19, 2010

PaperShow for Teachers Primary Notebook Paper

When PaperShow for Teachers was released I was excited to find out that there was a range of different note taking paper that could be utilized with this innovative solution. If you are working in the primary grades you should consider purchasing the Canson PaperShow for Teachers Primary Notebook paper. The notebook is set up like primary styled paper that students are accustomed to using when doing written work. Using PaperShow for Teachers Primary Notebook teachers can model how to correctly form the letters of the alphabet and have students watch them on the screen.

Similarly teachers could trace the letters on the PaperShow for Teachers Primary Notebook before hand and have students practice their penmanship, right on the notebook page. Using this technique teachers can also capture the students handwriting sample, and save it as a PDF in the student's portfolio. To get the students involved in the handwriting lesson simply pass the PaperShow for Teachers Primary Notebook around the class with the pen and have students write the letters. Remember that the Canson Digital Pen has about a 30 foot range from the USB dongle so it is possible to walk around the room using this solution. No need for you to be tied to the front of the classroom.

In my next post I will share with you how to use the PaperShow for Teachers Interactive Paper to design writing templates that would allow students to practice their handwriting on pre-printed pages.

Tuesday, September 14, 2010

Doing a Quick PaperShow Webinar

With the right tools it is easy to quickly do an impromptu webinar with good results. Today I had a chance to do a screensharing session with my friend and colleague Karen Janowski showing her the capabilities of PaperShow. For those of us in the field of assistive technology we are always looking for new tools that can be used to support students in the classroom. For those students who have in their Individualized Education Program that they are to be provided by their teachers with classroom notes, PaperShow can be a god send. In today's classrooms, teachers generally have access to a computer and data projector and with the addition of PaperShow they can simply write their notes on the PaperShow Flipchart paper for all of the students to see. Just plug in the PaperShow USB key and you are ready to get started- you see no software installation is needed, everything runs off the USB key. When they are done with the class they can save the notes as a PDF file and email it to the students or post it to the schools web site for easy retrieval. Now back to the impromptu screen sharing session.

Karen and I have been using Skype for some time and we regularly talk with each other about assistive technology and whats new. Today we started chatting and then called each other to talk about PaperShow. Using 
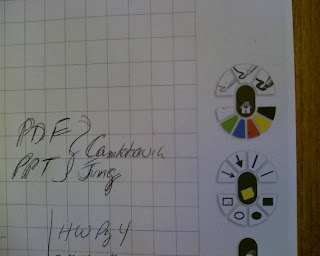
Glance for the screen sharing I started a session and I sent Karen a link in Skype that she could click on. Within seconds we were up and running. Glance still remains one of the easiest screen sharing tools out there. With a simple click you are up an running in no time. One last detail- I wanted to to be able to show Karen some of the controls on the PaperShow Flipchart paper and so I connected the iPevo Point 2 View camera so that I could show her how I was using the PaperShow pen and paper. With all my technology humming, I was able to show Karen both my computer screen and what I was writing as if she was looking over my shoulder. Karen was intrigued with the possibilities as I am with how we can support students in the mainstream that may need to have notes supplied by the teacher. Using PaperShow in the classroom is definitely the way to go as an accommodation for students who need to have notes provided to them.

Tuesday, September 7, 2010

Importing a List of Images into PaperShow for Teachers

For the past year I have used PaperShow extensively in my teaching and when I am doing workshops and presentations. I have primarily used PaperShow as a digital flipchart which has really worked out really well. Recently, I have begun to use PaperShow when teaching my graduate course in Action Research to make my PowerPoint presentations more interactive and engaging which has put a whole new spin on how I am using this innovative and exciting product. Having said this, there may be times in the classroom or in your training session that all you want to do is to be able to show and annotate images and don't really have the need for a full blown PowerPoint presentation. So the question is- is there a way for me to bring in just a list of images that I can then show and annotate? Of course the answer is a resounding yes! In fact you can import jpg, gif, and png files into the PaperShow application and then print them on the 8 1/2 x 11 PaperShow paper so that you can annotate on top of them. If you plan on importing a series of images I would recommend that you place all of the images that you want to use in a folder which will make it easier to import as you will see in the video below. So go ahead and feel free to use PaperShow just with a list of images. This technique works equally well on the Mac and on a PC.

Wednesday, September 1, 2010

Getting Started with PaperShow for Teachers

Congratulations on your purchase of PaperShow Now it is time to get you up and running so that you can use it effectively in the classroom. With PaperShow for Teachers it is easy to make your notes and lectures come to life with color, images, audio and video. In this blog I will explore different ways you can use PaperShow for Teachers in the classroom and provide you with some tips and tricks.


So lets get started!If you haven't done so already, open the battery compartment of the digital pen and insert the supplied battery. Replace the cover of the pen. Now insert the USB key into any USB port on your computer to launch the PaperShow for Teachers application. If you are on a Macintosh you will have to follow the onscreen direction and enter a code when prompted for the Bluetooth pairing. On a Windows computer the PaperShow for Teachers app should open and you will be prompted to take the cap off of the pen so that it can be paired. Once that is complete you can click on Open a New Whiteboard and you are ready to go. Touch the pen to the paper and you are ready to use all of the tools on the paper.

On the Right hand side of the paper you will find all of your controls to change the pen tip width and color. You can also add lines, squares, triangles, circles and filled in shapes with PaperShow for Teachers. When you are through using PaperShow for Teachers simply save what you were working on to the key so that you can revisit the information on another day or you can Export the contents as a PDF file. More about these features in another blog post. So explore the toolkit and let me know what you think.

PaperShow for Teachers is available from AssistiveTek, LLC. For information about purchasing and training contact me.